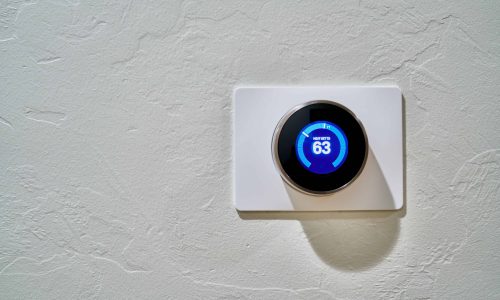
Essentially the control panel for your air conditioner and heaters, thermostats are more than likely the most important part of either HVAC system. They allow homeowners to change the temperature as needed, making their home as warm or cool as possible. So, when it malfunctions or if it just needs an upgrade, knowing how to wire a thermostat for a heat pump to suit the new system can be a big help.
With the ability to turn the power off as needed, all a homeowner needs is to reattach the wires appropriately. But, with each thermostat being different from the last and some even using different numbers of wires, the simple job can become intimidating. Fortunately, we’ve put together this guide to help make it easier.
If you need help at any point, just call our team at River Valley Air Conditioning!
What’s Your System’s Voltage?

We need to understand the system’s voltage to start understanding how to wire thermostats for heat pumps. When it comes to your thermostat, there are 3 different types, with each being used for a specific type of HVAC system. Ultimately, the more electricity the system uses, the higher the voltage is and the more intricate the wiring is.
One type of voltage power and system is the 110V or 240V. Though they may seem like two distinct numbers, these voltage systems are incredibly easy to understand. Classified as high-voltage – sometimes also line-voltage – systems, this is the kind of power you need for electric furnaces and baseboard systems.
On the opposite end of the spectrum is the millivolt power system, which is best for gas systems that don’t use electricity. Since heat pumps don’t need such high or low voltages, the best way answer to how to wire heat pump thermostats lies in the 24-volt system and its wiring. This kind of power system provides enough power for heat pumps as well as higher-efficiency ACs, gas furnaces, and air-quality appliances.
Most, if not all, heat pumps fall under the umbrella of 24-volt systems, so, all you need to do is follow along. If you aren’t sure if your heat pump model meets the specifications, checking your user manual or contacting the manufacturer can help.
The Number of Wires Needed
Another thing you might need to look into before rewiring a thermostat is the number of wires coming out from the back. While the most common is the 2 wire system, some can even have anywhere from 3 to 8 different wires. The number of wires used here can help you determine what your old thermostat controlled as well as what HVAC system it can handle now.
Remember that the number of wires also relates to the system’s number of parts. A 2-wire system often is incredibly simple and, as a result, works only for furnaces and not ACs. On the other hand, an 7 or 8-wired thermostat can power two stages of heating and cooling on top of an auxiliary heating system if it’s needed,
4 Wire Thermostats
One key thing to remember before you start rewiring your thermostat – regardless of the number of wires – is to take a photo of their initial locations before you start. In case you need to swap the old thermostat back or something fails, knowing where the wires were connected can be a big help.
When it comes to answering “how to wire a thermostat for a heat pump,” the most common method would be for these kinds of systems. Many typical heat pumps need at least 4 wires to run the heating and cooling in addition to the separate units. And, since there are fewer wires in the thermostat, the wiring for these heat pumps is far easier.
With a 4 wire setup, the thermostat for your heat pump will need red, white, yellow, and green wires. These typically correspond to the general 24V power, heating, cooling, and fan, respectively. Since this setup is for standard heat pumps, you don’t need to worry about any other wires and can tuck them away but within reach.
5 Wire Thermostats
5-wire power systems are essentially the same as a 4-wire system, though with an added C wire. Also called the common wire, this is the wire that’s used to keep the thermostat running all day, even if your heat pump isn’t running. Many newer thermostats use the C wire, so if you don’t find a black wire connected to a terminal, you had an older model thermostat.
If your new thermostat is a smart model or if its manual mentions the need for the C wire, the layout is the same. You’ll need the same red and white wire that every system needs, and yellow and green for the AC and fan. However, the fifth wire is typically one that’s unused; the black or even blue wire. This one wire completes your home’s 24V circuit to power it continuously.
6 Wire Thermostats

The heat pump itself is the main difference between the 6-wire thermostat configuration and the ones mentioned above when learning how to wire a heat pump thermostat. The wires are connected like a 4 or 5-wire setup, but what the sixth wire does and where it’s attached depends on the heat pump’s features.
If the heat pump has auxiliary heat strips, you attach the light blue wire to the aux terminal. Similarly, if the system has two-stage cooling, the wire is instead put into the second cooling terminal.
However, if your home’s heat pump has two-stage heating instead, you use the brown wire instead. Having the thermostat’s manual on hand when working with these kinds of systems can save you a lot of time and even be much safer.
The Meaning of Different Wire Colors
Though we’ve mentioned the color of the wires earlier, with the C wire often being either blue or black, the others are often connected to your heat pump or other HVAC system’s function.
Red is the most common wire among the different thermostats and their systems, regardless of whether it’s an AC or a heat pump. The red wire is what transfers power to the HVAC system for running the system whenever it turns on. Both ACs and furnaces have it, and so does your heat pump.
The white and yellow wires are connected to the ports for heating and cooling, respectively. Since heat pumps are used for both heating and cooling, these two wires are also common. Brown – or orange in some thermostats – and light blue are similarly used for more complex, two-stage heating and cooling. This combination of color and meaning can often make learning how to wire a thermostat to a heat pump much easier.
Adding in a Thermostat’s C Wire
As we’ve mentioned above, many thermostats and the heat pumps they’re connected to often have anywhere from 4 to 6 wires at their most basic form. In all of those cases, though, you’ll also notice that the C wire is always used in the wiring system. But, unless you’re installing a thermostat in a new home, there’s a high chance that you’ll need to add in a C wire.
You can go about it in many different ways, especially if you want to avoid doing electrical work or if you don’t know someone who can do it. Many thermostat brands may say you can skip adding in the wire, but the trade-off is less efficiency.
If you want to keep the heat pump working to its peak while keeping all its functions intact, the best and safest way to ensure it all is to use any other unused wire in the bundle. The wires’ colors are often more suggestions than anything. The way specific colors are assigned is to make it easier for technicians or professionals to understand the wiring later on.
Takeaway
Thermostats are a necessary part of your home’s HVAC systems, whether air conditioners or heat pumps. When you choose to upgrade your home’s HVAC system to a more modern model, upgrading your thermostat can seem natural. However, the wiring for your new thermostat can be far more complex than it may seem, and its placement can only make it harder.
Fortunately, wiring a thermostat for a new heat pump is fairly easy with our guide and with the manual on hand. If you need any help to ensure a correct installation, just contact us at River Valley Air Conditioning for an appointment!
